Agile Web Development That Works

Agile Web Development That Works

Agile web development is not a specific process, action, or a daylong exercise. Agile is a mindset, an attitude with which a project is undertaken.
It means streamlining the project, taking away time-sucks, performing frequent sanity checks, and making sure that you’re not spending excessive time on things that don’t add value to the project.
It’s about spending quality time on actions that add value to the website and make it better, and taking away time and energy from parts of the process that cause headaches.
Your team will reach the same goals and milestones, but in half the time or less.
In this article, I’ll show you how the agile project management method can be applied to developing websites.

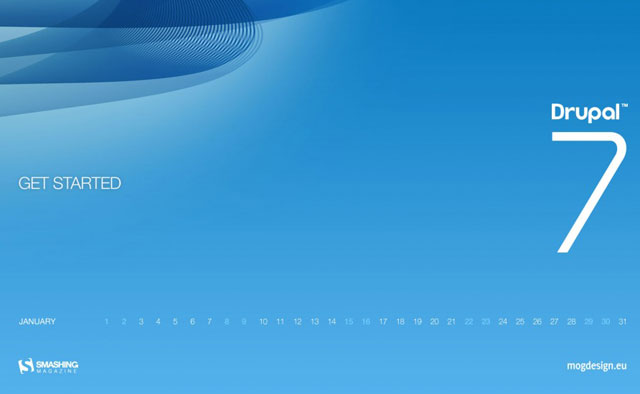
Traditional Web Development Process


Typical web development process circa 2000-2007.

Around the turn of the century, a bunch of us web geeks were working hard on figuring out how to design websites effectively. We started with the tools and processes used in print, video and radio, and modified them for the internet.

We embraced paper prototypes, wireframes, user personas and use-case planning, as well as information architecture planning with site maps and flow charts.

When Jesse James Garrett and Steve Krug came out with their usability/user-centered-design books, we heaved a sigh of relief, not because what they were saying was new, but because they articulated the subject in a way that even the most technology-phobic print designer could understand.

The Turning Point

We got an RFP recently from a college that is redesigning their website and wanted to hire us for design and planning. It’s a great school and it sounded like a great project, the likes of which we’ve done dozens of times before.

But when we sat down to write the proposal, we found ourselves scratching our heads about how to approach it.

After a while, we realized why. The RFP was looking for a web developer from 2005.
Wireframes, site maps, use-case scenarios and focus groups — the traditional web development process — have served us well for almost 10 years, and we developed effective websites using them, but in a high-paced industry like ours, speed and efficiency are very important.

Now we see that they were tools of the Wild West. They still have their places in the new world, but they’ve been reduced to a niche player, and are only used on the trickiest of web projects.

What’s Changed?

There have been three major changes in the past 5 years that have fundamentally altered how we design websites.

First, everyone uses the Internet. I mean everyone. Ten years when we met with marketing directors or CEOs, most of them had secretaries who printed out their email to be replied to. Now, every CEO has a Blackberry or iPhone.

Secondly, we have gained a better understanding of how people use sites. Five years ago, we had best guesses to start from, now we have best practices. For example, every user who goes to a college website knows to look for the link that says "Admissions", and likewise every college knows to have a link called "Admissions". It’s hard to imagine, but these were big questions 10 years ago that merited days of discussion and testing.

Third, and possibly most importantly, are the vast strides in content management systems (CMS) technologies over the past 5 years. Any reasonably talented usability consultant (a profession that also didn’t exist 10 years ago) can work with a developer to customize any number of inexpensive or freely available, open-sourced CMSs, so that even my grandparents can edit a website.

Now we’re at a point where the work that used to take up 80% of a web development project is unnecessary.
It’s time to put aside the processes that supported that work, and graduate to the next level.

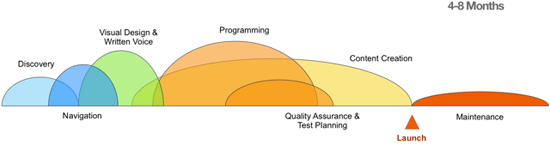
Agile Web Development Process

 
Modern (agile) web development process.

In the process shown above, editors are interacting with content and navigation on day one. Navigation is fluid, and we’re getting in front of users faster and making 100 minor corrections to our course, instead of waiting a few weeks and making major adjustments.

Flexible Processes for a Flexible Web

Get your team off of email and hold the phone. Stop the endless back-and-forth, internal meetings, and rehashing of the same issues each week.

Get everyone in the office and lock them in (figuratively). Bring the decision makers, the content entry folks, and your IT specialists, and you have a recipe for success.

While every part of an agile web development process runs more smoothly with rapid iterations, it’s the reduction of time spent on overhead — scheduling, recapping, hunting someone down for feedback, mood swings, staff reorganizations, training, etc. — that really gives you your biggest time-savings. Instead of your key stakeholders having to attend 4 meetings over 5 months, they need to attend 3 hours of meetings over 3 days.

With agile development, your team will be immersed in building the website within a couple of weeks of starting the project, and you’ll be getting real-time feedback from real website users within a month.

Your internal team will be empowered to make these changes and will be trained in asking the key questions, which are:
  • Does this change help us reach our goals?
  • Do these images and words support our brand?
  • Is this solution better than what’s there now?
  • What’s the worst that could happen if we tried this for a week?
  • Once the week is done, how should we decide if we leave it or change it back?
Now is a very exciting time for technology, and this new method of web development is a tool that gets right to the heart of the matter, and avoids wasting time on the noise and minutia that slows us down.

A Case Study of Agile Web Development

We worked with Technical Career Institutes in Manhattan to re-launch their 100-page college website in 1 month.

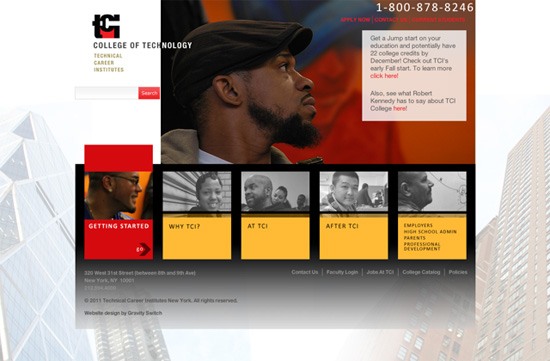
They wanted a slick, modern, engaging design to reflect their brand. They want it to be easy to edit, and easy for them to maintain.

Within 2.5 months of signing a contract with us, their inquiries had increased by 100% — a wonderful outcome of the re-design. (We’re continuing to work with them to understand where they lose people in the application process, and will continue to improve these numbers.)
In three days, despite not having a clear brand statement, we took all the photos, designed the new website look, got sign-off (and excitement) from over a dozen key stakeholders, programmed the themes and tested them on all priority browsers, finalized navigation and created about half the pages on the website.

What follows is a breakdown of our 1-month timeline.

Week 1: Setup

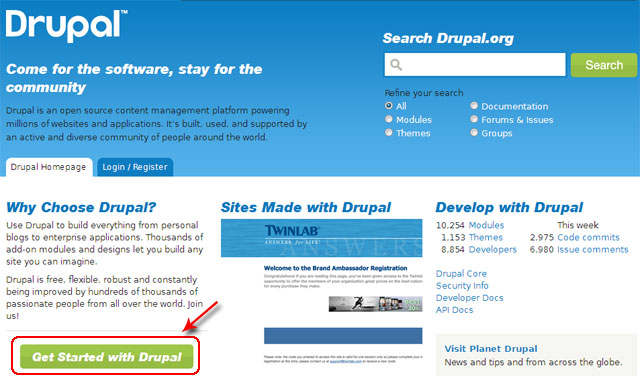
Initial server setup by our team. We chose Drupal because it’s powerful and can be configured and customized to be very easy for end-users to use. Using the Acquia Drupal install, security updates become easy. (We have a standard module list that, if you ask about in the comments, I’ll discuss in another article.)

Week 2: Onsite Training

Over the course of this week, we worked with TCI to understand their brand, create the visual design of the website, take hundreds of photos, define the navigation, and train 15 TCI staff members on content management. This allowed them to completely rewrite 15 pages and migrate 25 more from the old site to the new site, set up multiple web forms and calendar integration, and connect all the hooks to their existing admissions systems.

Weeks 3-4: Cleanup and Go Live

We spent the last two weeks tidying up and preparing to go into production. TCI continued to add and tweak content while we refined the design and the code, cropped pictures for them, and helped them with navigation problems. We made the site more search-engine-friendly and generally kept things moving forward to deployment.

Post-Launch

Both our team and their team have made dozens of tweaks to the website after the site was launched. We continue to monitor website traffic to optimize the website for search engine traffic.

Conclusion

Using agile project management reduces traditional website development processes significantly. What could have taken 4-8 months under a traditional process, we reduced to 1 month. Cutting down the build process to its bare essentials reduces bottlenecks and project overhead, making it as efficient and results-driven as possible.

From sixrevisions.com

Free ebook - Android UI Design Patterns

Mutual Mobile inc. has released an updated version of their Android design guidelines document. This excellent and compact (44 pages) document can be valuable for anyone writing or designing software for Android. 

The guidelines contain following subjects:
  • sizes and resolution
  • UI elements
  • icons
  • dialog and listview icons
  • widgets
  • draw9patch
  • gestures
  • gingerbread
  • honeycomb
  • conventions


There's also an interesting post in Sony Ericsson's developer world written by Adam Beckley, a Mutual Mobile designer, covering the Android design guidelines. Check it out here.
Android fragmentation is a legitimate fear, but a lot of that bellyaching comes from designers who are intimidated by the platform and its lack of helpful resources. I was one of those designers once, and I realised it was time to do something about it. - Adam Beckley

Luật thương mại điện tử

Sân chơi nào cũng có luật lệ, việc tìm hiểu luật trước khi chơi là điều tối quan trọng, giúp ta tránh được những rắc rối không đáng có. Trong xu hướng toàn cầu hóa, thương mại điện tử (TMĐT) đóng vai trò rất quan trọng trong nền kinh tế cũng như sự phát triển chung của xã hội. Để quản lý chặt chẽ loại hình kinh tế mới mẻ và phức tạp này, Chính phủ đã đưa ra khá nhiều văn bản, nghị định, nghị quyết, thông tư liên quan. Nếu bạn đang có kế hoạch tham gia TMĐT thì không nên bỏ qua những văn bản luật sau:

Năm 2008

- Nghị định số 97/2008/NĐ-CP – Quản lý, cung cấp, sử dụng dịch vụ internet và thông tin điện tử trên internet
- Nghị định số 90/2008/NĐ-CP – Chống thư rác
- Thông tư số 78/2008/TT-BCT – Hướng dẫn thi hành một số nội dung của Nghị định số 27/2007/NĐ-CP về giao dịch điện tử trong hoạt động tài chính
- Thông tư số 09/2008/TT-BCT – Hướng dẫn Nghị định thương mại điện tử về cung cấp thông tin và giao kết hợp đồng trên website TMĐT
- Quyết định số 343/2008/QĐ-TTg – Thành lập Ban chỉ đạo quốc gia về công nghệ thông tin

Năm 2007

- Quyết định số 018/2007/QĐ-BTM – Ban hành Quy chế cấp chứng nhận xuất xứ điện tử
- Nghị định số 71/2007/NĐ-CP – Quy định chi tiết và hướng dẫn thực hiện một số điều của Luật công nghệ thông tin về công nghiệp công nghệ thông tin
- Nghị định số 63/2007/NĐ-CP – Quy định xử phạt vi phạm hành chính trong lĩnh vực công nghệ thông tin
- Nghị định số 27/2007/NĐ-CP – Quy định chi tiết thi hành Luật Giao dịch điện tử trong hoạt động tài chính
- Nghị định số 26/2007/NĐ-CP – Quy định chi tiết thi hành Luật Giao dịch điện tử về Chữ ký số và Dịch vụ chứng thực chữ ký số

Năm 2006

- Nghị định số 57/2006/NĐ-CP về TMĐT
- Luật Công nghệ thông tin

Năm 2005

- Luật giao dịch điện tử
- Kế hoạch tổng thể phát triển TMĐT giai đoạn 2006-2010

Báo cáo thương mại điện tử Việt Nam của Bộ Công Thương

- Báo cáo TMĐT Việt Nam năm 2008 – Bộ Công Thương
- Báo cáo TMĐT Việt Nam năm 2007 – Bộ Công Thương
- Báo cáo TMĐT Việt Nam năm 2006 – Bộ Công Thương
- Báo cáo TMĐT Việt Nam năm 2005 – Bộ Công Thương
- Báo cáo TMĐT Việt Nam năm 2004 – Bộ Công Thương
- Báo cáo TMĐT Việt Nam năm 2003 – Bộ Công Thương

Mozilla quietly posts complete Firefox 5


Đây chắc hẳn là một tin vui đối với những người dùng ưa thích trình duyệt Cáo Lửa. Sau gần 3 tháng kể từ ngày ra mắt phiên bản 4.0, Mozilla vào ngày hôm qua đã lặng lẽ phát hành phiên bản hoàn chỉnh của Firefox 5. Ở phiên bản mới này, ngoài việc giao diện có nhiều nét giống trình duyệt Chrome của Google, Mozilla tập trung vào cải thiện một số vấn đề nhỏ gặp phải trên Firefox 4. Firefox 5 hỗ trợ tốt hơn cho CSS, HTML5, tăng tốc phần cứng (Canvas) đồng thời giúp người dùng bảo mật thông tin và quyền cá nhân tốt hơn thông qua lựa chọn Do Not Track. Bên cạnh đó, hiệu năng của các tab chạy nền, khả năng tích hợp với Linux, WebGL, kiểm tra lỗi chính tả và mức độ khai thác bộ nhớ cũng là những điểm được nâng cấp trong phiên bản thứ 5. Mặc phải đến 21/6 mới là ngày phát hành chính thức của Firefox 5 nhưng nhiều khả năng phiên bản đó sẽ không có khác biệt gì lớn so với phiên bản phát hành ngày hôm qua. Thế hệ tiếp theo, Firefox 6, đang được phát triển ở giai đoạn alpha nhưng rất có thể sẽ được đưa lên bước beta trong vòng 2 tuần tới. Bạn đọc muốn trải nghiệm Firefox 5 có thể tải tại đây.

Tạo hiệu ứng phóng to trong bức ảnh

Trong bài tiếp theo trong series hướng dẫn về Photoshop, chúng tôi sẽ hướng dẫn các bạn một số thao tác cơ bản để tạo hiệu ứng phóng to với bất kỳ bức ảnh nào. Cụ thể tại đây, chúng ta sẽ sử dụng bộ lọc Radial Blur của Photoshop, và một số thủ thuật với Layer Mask và Gradient Tool.

Ảnh mẫu được sử dụng trong bài thử nghiệm của chúng ta:


và kết quả đạt được sau khi áp dụng:


Trước tiên, các bạn phải nhân đôi lớp Layer gốc của bức ảnh, để những thao tác sau được áp dụng trên 1 lớp riêng biệt. Chọn menu Layer New > Layer via Copy, hoặc sử dụng phím tắt Ctrl + J (Windows) / Command + J (Mac) trên bàn phím:


Khi nhìn vào bảng điều khiển chính, chúng ta sẽ thấy 2 Layer: một ở dưới (Layer gốc) và Layer 1 (tạo mới) ở trên:


Lựa chọn Layer 1 và mở menu Filter > Blur > Radial Blur:


Cửa sổ điều khiển Radial Blur của Photoshop hiển thị với 2 lựa chọn chính trong phần Blur Method là Spin và Zoom. Tại đây, chúng ta sẽ sử dụng Zoom với thông số Amount là 50 và Quality – Best:


Nhấn OK để áp dụng hiệu ứng và đóng cửa sổ này lại, chúng ta sẽ có tác phẩm tạm thời như sau:


Tùy thuộc vào cấu hình máy tính và các thiết lập khác thì quá trình áp dụng này sẽ diễn ra nhanh hoặc chậm

Nếu cảm thấy chưa hài lòng với kết quả này, hãy sử dụng chức năng Undo Radial Blur trong mục Edit hoặc nhấn phím tắt Ctrl + Z (Windows) / Command + Z (Mac):


Sau đó, áp dụng lại hiệu ứng trên bằng tổ hợp phím Ctrl + Alt + F (Windows) hoặc Command + Option + F (Mac), chọn giá trị Amount khác, thay đổi vị trí trong ô Blur Center... thực hiện các bước này cho đến khi bạn cảm thấy vừa ý.

Tuy nhiên, vấn đề chính khi chúng ta sử dụng hiệu ứng này là Blur đã che phủ toàn bộ bức ảnh, không thực sự phù hợp với ý tưởng của bài thử nghiệm. Cụ thể, tại đây, chúng ta cần làm rõ phần khuôn mặt của em bé, chứ không phải tất cả khung cảnh. Vẫn chọn Layer 1, nhấn vào biểu tượng Layer Mask ở dưới khay hệ thống:


Khi nhìn vào bức ảnh chính, mọi người sẽ không thấy hiện tượng gì xảy ra. Nhưng trong cửa sổ điều khiển chính của Layer, các bạn sẽ nhìn thấy 1 hình chữ nhật màu trắng bên cạnh, đó là đã tạo thành công lớp Layer Mask:


Tiếp theo, lựa chọn công cụ Gradient Tool từ bảng Tools hoặc nhấn nút G trên bàn phím:


Sau đó, nhấn chuột phải trong Windows hoặc Control + click (Mac) tại bất cứ vị trí nào trên bức ảnh để hiển thị bảng Gradient Picker, tại đây các bạn chọn phần Black to White (xếp thứ 3 từ trái sang phải, hàng trên cùng):


Để làm hiển thị rõ phần khuôn mặt, chúng ta sẽ phải kéo chuột từ phần giữa ra bên ngoài. Cụ thể, ở đây chiếc mũi được chọn làm phần trung tâm, từ từ kéo chuột từ đây ra bên ngoài bên trái (theo hình dưới):


Do thao tác này được thực hiện trên phần Layer Mask, do vậy sẽ không có sự thay đổi nào trên Layer 1. Thay vào đó, kết quả này sẽ được hiển thị trực tiếp trên lớp Layer Mask vừa tạo:


Mặc dù chúng ta không thể nhìn thấy phần Gradient trong cửa sổ chính, nhưng lại rất rõ ràng qua Layer Mask. Phần diện tích màu đen bên trong được ẩn đi, và các thành phần Gradient này trở nên sáng hơn về các góc, còn toàn bộ phần màu trắng chính là những gì chúng ta đang nhìn thấy:


Trong trường hợp hiệu ứng Blur này quá “mạnh”, hãy giảm độ Opacity của Layer 1 xuống tới mức phù hợp. Cụ thể tại đây, chúng tôi thay đổi về mức 70%:


Và đây là kết quả hoàn thiện của chúng ta:


Thiết kế website động với mã nguồn Drupal 7

Drupal là một hệ thống quản trị nội dung (CMS) mã nguồn mở, miễn phí, rất mạnh mẽ và ổn định, được xây dựng cách đây hơn 10 năm. Sự ổn định và mạnh mẽ từ nhân của Drupal đã khiến cho mã nguồn này được tin dùng từ những blog, website nhỏ đến các mạng xã hội cộng tác lớn.


 Với cấu trúc linh hoạt giúp cho các lập trình viên mở rộng chức năng không hạn chế theo nhu cầu sử dụng. Ví dụ như bạn có thể gán thêm thuộc tính cho rất nhiều đối tượng, trong đó có bài viết, bình luận, người dùng và thậm chí gán thuộc tính cho các thẻ (tag). Một thế mạnh khác của Drupal là rất thân thiện với các bộ máy tìm kiếm, giúp cho các webmaster đở vất vả trong quá trình SEO của mình. Ngoài ra, mã nguồn còn được tối ưu để nâng cao hiệu suất hoạt động giúp tiết kiệm tài nguyên của hệ thống.

Phiên bản Drupal 7 mang đến một giao diện quản trị hoàn toàn mới với rất nhiều cải tiến cho người phát triển website và người quản lí nội dung. Nó hỗ trợ nhiều CSDL khác nhau, từ MySQL cho đến PostgreSQL, SQLite, MS SQL Server, Oracle… và thậm chí có thể mở rộng để hỗ trợ các dạng NoSQL. Bên cạnh các ưu điểm như thế, Drupal còn tồn tại một khuyết điểm nhỏ là khó sử dụng đối với người dùng mới. Trong loạt bài viết này, tác giả sẽ giới thiệu đến các bạn một số bước xây dựng và thiết kế cơ bản nhất dựa trên mã nguồn Drupal 7.

1. Tạo localhost bằng XAMPP

Localhost được hiểu như là một hosting hoạt động ngay trên máy tính của bạn, với địa chỉ IP mặc định là 127.0.0.1 và tên miền của nó là http://localhost/. Localhost được người quản trị website sử dụng vào việc thiết kế website và kiểm tra code trước khi đưa vào hoạt động trên hosting. Hiện nay có nhiều phần mềm tạo localhost, bài viết này sẽ đưa ra một số gợi ý về cách tạo localhost bằng phần mềm XAMPP.

* Tải về và cài đặt XAMPP

Đầu tiên, bạn hãy tải phần mềm XAMPP từ trang chủ Apachefriends. Tại trang chủ của XAMPP, bạn bấm vào liên kết XAMPP trên thanh menu, rồi chọn phiên bản XAMPP phù hợp với hệ điều hành. Đối với hệ điều hành Windows, bạn bấm vào liên kết XAMPP for Windows rồi kéo thanh cuộn của trình duyệt đến khung XAMPP for Windows 1.7.4, 26.1.2011 và bấm vào một trong ba định dạng (exe, zip, 7z) để tải về.

Thiết kế website động với mã nguồn Drupal 7

Sau khi tải về, bạn bấm đôi vào tập tin xampp-win32-1.7.4-VC6-installer.exe để khởi động tiến trình cài đặt. Trong hộp thoại hiện ra, bạn bấm Next để chuyển đến bước Choose Install Lacation.

Thiết kế website động với mã nguồn Drupal 7

Tại bước này, bạn bấm Browse trong khung Destination Folder nếu muốn chọn lại thư mục lưu trữ, mặc định là C:\xampp với C là ổ đĩa chứa hệ điều hành. Đồng thời, bạn cũng được cung cấp hai thông tin Space required- dung lượng yêu cầu, Space available- dung lượng còn trống, bấm Next.

Thiết kế website động với mã nguồn Drupal 7

Đến bước XAMPP Options, bạn có thể thay đổi các thiết lập bằng cách bỏ dấu hoặc thêm dấu chọn ở các ô tương ứng. Gồm có các thiết lập sau: Create a XAMPP desktop icon (tạo biểu tượng trên màn hình desktop), Create an Apache Friend XAMPP folder in the start menu (tạo menu trong danh sách của nút Start), Install Apache as service (cài đặt thành phần Apache), Install MySQL as service (cài đặt thành phần MySQL), Install Filezilla as service (cài đặt thành phần Filezilla), bấm Install để bắt đầu tiến trình cài đặt.

Sau khi cài đặt xong, bạn sẽ nhìn thấy biểu tượng của chương trình chạy ở khay hệ thống và cửa sổ quản lý ứng dụng XAMPP Control Panel Application. Thư mục cài đặt mặc định của phần mềm là C:\xampp, với C: là ổ đĩa chứa hệ điều hành, thư mục gốc của localhost là htdocs (C:\xampp\htdocs), nơi đặt mã nguồn Drupal. Thư mục gốc này hoàn toàn có thể thay đổi thành một tên khác nhưng việc thay đổi khá phức tạp và gây ra lỗi trong lúc chạy XAMPP khi thao tác thay đổi không chính xác.

Thiết kế website động với mã nguồn Drupal 7

Lưu ý: bạn không nên tạo localhost bằng phần mềm Appserv vì khi cài đặt Drupal 7 có thể xảy lỗi ở bước Set up database.

* Tạo cơ sở dữ liệu

Trong quá trình cài đặt Drupal 7 sẽ đòi hỏi các thông số liên quan đến cơ sở dữ liệu (Database). Do đó, bạn cần phải tạo ra tên cơ sở dữ liệu trong cửa sổ quản lý phpMyAdmin. Để thực hiện, bạn nhập vào thanh Address của trình duyệt Internet Explorer địa chỉ http://localhost/phpmyadmin.

Thiết kế website động với mã nguồn Drupal 7

Trong trang hiện ra, bạn nhập tên cơ sở dữ liệu vào ô bên dưới dòng chữ Create new database (ví dụ nhập drupal, tên cơ sở dữ liệu này được sử dụng cho cả bài viết), nhấn nút Create. Lưu ý, bạn cần ghi nhớ tên cơ sở dữ liệu đã tạo để khai báo trong quá trình cài đặt Drupal. Hoàn toàn khác với Appserv, thay vì bạn tự quy định mật khẩu đăng nhập cơ sở dữ liệu thì XAMPP sẽ cung cấp luôn thông số: database user: root, password: (không có).

2. Cài đặt Drupal 7

* Tải về mã nguồn Drupal 7

Thiết kế website động với mã nguồn Drupal 7 - Phần 2

Như đã giới thiệu, Drupal 7 là một hệ thống quản trị nội dung mã nguồn mở, rất ổn định và mạnh mẻ. Nó được cung cấp miễn phí tại trang chủ http://drupal.org. Tại trang chủ, bạn bấm vào liên kết Get Start with Drupal để chuyển đến trang tải về Drupal 7.2.

Thiết kế website động với mã nguồn Drupal 7 - Phần 2

Tiếp theo, bạn bấm Download Drupal 7.2 và bấm vào liên kết zip (3,01MB) ở phiên bản 7.2. Bạn có thể dùng trình tăng tốc download hoặc tải bằng trình download của Windows.

Thiết kế website động với mã nguồn Drupal 7 - Phần 2

Ngoài ra, bạn có thể tải bản Drupal 7.2 được tích hợp sẵn gói ngôn ngữ tiếng Việt và một số module hữu ích giúp tăng khả năng SEO của Drupal. 

Sau khi tải về, bạn giải nén rồi sao chép thư mục drupal-7.2 vào thư mục gốc htdocs của localhost (C:\xampp\htdocs), rồi đổi tên thư mục này lại theo ý thích của bạn, chẳng hạn: news (tên thư mục này được sử dụng cho cả bài viết).

* Cài đặt Drupal 7

Bạn khởi động trình duyệt Mozilla Firefox rồi nhập vào thanh địa chỉ đường dẫn http://localhost/news/install.php (hoặc http://localhost/news/). Quá trình cài đặt Drupal phải trải qua 7 bước. Trong bước đầu tiên Choose profile, bạn sẽ có hai lựa chọn Standard Minimal. Bạn nên chọn kiểu cài đặt Standard vì nó sẽ giúp bạn cài đặt đầy đủ những tính năng cần thiết cho việc quản lý website, còn kiểu cài đặt Minimal chỉ kích hoạt một số tính năng, bấm Save and continue để tiếp tục.

Thiết kế website động với mã nguồn Drupal 7 - Phần 2

Đến bước Choose language, mặc định chỉ có duy nhất ô chọn English (built-in). Nếu muốn thêm gói ngôn ngữ khác (ví dụ Tiếng Việt) thì bạn bấm vào liên kết Learn how to install Drupal in other languages để được hướng dẫn cụ thể. Hoặc truy cập trực tiếp vào địa chỉ này để tải gói Vietnamese dành cho phiên bản 7.2. Sau khi tải về, bạn hãy sao chép tập tin này vào thư mục C:\xampp\htdocs\info\profiles\standard\translations. Khi đó, ở bước thứ hai này sẽ có thêm lựa chọn Vietnamese (Tiếng Việt). Nhưng để thuận tiện cho việc cài đặt Module sau này thì bạn nên chọn ngôn ngữ English. Khi đã hoàn tất các bước thiết kế thì mới chuyển giao diện về ngôn ngữ Tiếng Việt. Bấm Save and continue để chuyển sang bước tiếp theo.

Thiết kế website động với mã nguồn Drupal 7 - Phần 2

Bước Verify requirements không cần thiết khi cài đặt trên localhost. Nên tiến trình cài đặt tiếp tục chuyển qua bước Set up database. Trong bước này, bạn giữ mặc định ở mục Database type, nhập tên cơ sở dữ liệu vào ô Database name (ví dụ như drupal đã khai báo trong phần 1), nhập root vào ô Database username, để trống ở ô Database password. Riêng đối với mục Advanced Options, bạn có thể thêm tiền tố vào trước các tên bảng trong cơ sở dữ liệu, ví dụ như drupal_, rồi bấm Save and continue.

Khi bước Install profile hoàn tất thì bạn tiến hành khai báo các thông tin liên quan đến website cần tạo, như Site name - tên website, Site email address - địa chỉ email nhận thông tin về tình trạng website, Username - tên tài khoản quản trị, Password Confirm password - mật khẩu.

Ngoài ra còn có một số thiết lập khác: Default country- chọn quốc gia, Default time zone- chọn múi giờ mặc định, Check for updates automatically- kiểm tra cập nhật tự động, Receive e-mail notifications- nhận thông báo qua email, xong bấm Save and continue. Đến bước Finished, quá trình cài đặt đã hoàn tất, bạn bấm vào liên kết Visit your new site để vào trang chủ của website.

3. Làm quen với hệ thống của Drupal 7

Trên thanh công cụ quản trị hệ thống của Drupal có các menu Dashboard- bảng quản lý các tác vụ thường dùng, Content- quản lý nội dung, Structure- quản lý cấu trúc website, Apperance- quản lý giao diện, People- quản lý tài khoản người dùng, Modules- quản lý cài đặt, kích hoạt, phân quyền module, Configuration- cấu hình website, Reports- các báo cáo về tình trạng hệ thống, Help- trợ giúp, Add content- thêm vào bài viết mới, Find content- tìm kiếm bài viết.
Đầu tiên, bạn cần thay đổi một số thông tin cơ bản của website. Bạn vào menu Configuration rồi bấm Site imformation tại khung System. Ở trang hiện ra, bạn có thể thêm vào câu khẩu hiệu tại ô Slogan, sửa tên website tại ô Site name, Number of posts on front page- chọn số lượng bài viết hiển thị tại trang chủ. Riêng đối với khung Error Pages, bạn có thể tạo trang báo lỗi 404 (báo lỗi trang không tồn tại) để thân thiện người dùng, rồi thêm đường dẫn vào ô Default 404 (not found) page. Khi xong, bạn bấm Save Configuration để thay đổi có hiệu lực.

Để viết bài cho website, bạn bấm Add content trên thanh công cụ, bấm vào liên kết Article ở trang hiện ra. Tiếp theo, bạn nhập tiêu đề bài viết vào ô b, nhập các từ khóa vào ô Tags (các từ khóa này giúp ích quá trình SEO, ngăn cách giữa các từ khóa là dấu phẩy (,), nhập nội dung vào khung Body (khung nhập nội dung này rất đơn giản, không có các công cụ soạn thảo văn bản, bạn có thể sử dụng các thẻ HTML), chọn định dạng văn bản ở trường Text Format.

Bạn bấm nút
Browse ở mục Image để chèn hình ảnh đại diện cho bài viết. Drupal chỉ hỗ trợ các định dạng ảnh png, gif, jpg, jpeg, dung lượng tập tin tải lên không quá 8MB.
Ngoài ra, bạn có thể quy định một số thuộc tính cho bài viết như Menu Settings- đánh dấu chọn vào ô Provide a menu link để tạo menu cho bài viết, Comment settings- mở hoặc đóng tính năng bình luận ở cuối bài viết, Authoring Information- thông tin về tác giả bài viết. Khi viết xong, bạn bấm Save.

 Nguồn: quantrimang.com.vn

Top 10 PMS for Remote Teams

Having trouble communicating with your remote team? Shared the wrong file to the team, and it takes 3 hours to resend to them one by one again? Your remote team misunderstands your project’s milestones and even objective? It never feels good to have these conflicts while bearing the stress of getting project done, but you can actually eliminate these issues by using the online project management software.


project management software Top 10 Project Management Software for Remote Teams


The rise of remote teams has led to the production of several great online project management systems to address the problems of teams facing productivity issues and the need for real-time updates. Online project management software not only breaks the barrier of distance by providing instant communication to collaborators, but also provides them a sharing environment which every teammate can get the same update, same file and same documentation.


It’s only the matter time for you to discover it, but we decided to introduce you 10 online project management software that provides tons of useful features for you such task setting and sharing, real-time updates, file sharing and even online wiki. Forget about getting into the trouble in every aspect of project management, now you only have to login on the web to access all-in-one project management system!


1. activeCollab


ActiveCollab helps collaborators through its time saving and easy-to-use features. Project leaders can set milestones for the team, add team members, assign tasks and get notified via e-mail for updates on the project. Also when replying or posting a comment, you don’t need to actually log in the system, you can reply and post comments via e-mail.


activecollab Top 10 Project Management Software for Remote Teams


With ActiveCollab, team leaders can provide real-time updates to their contractors/clients by giving them access to the system itself. I’ve personally used this and I’ve seen that it is pretty flexible on giving users permission on what features to use.


File sharing, time tracking, invoicing, project management, and notifications, all in one place: in your web server.

2. Assembla


Assembla has a ticketing system where teams in remote places are given tasks via tickets. I’ve used this and personally, I find it a little confusing at first but after spending some time with it, I get exactly how it works. It is like one of those online forums where people talk about things, only here, the project leader is the one who controls most of the game.


assembla Top 10 Project Management Software for Remote Teams


There are built-in wiki to help new users navigate their way through, and Assembla encourages its users to actually read and follow instructions.

3. Basecamp


Created by 37signals, a company which believes that less is more, Basecamp focuses on communication between users to achieve optimum performance. Instead of sending e-mail to several people, users can post directly to Basecamp and let people engaged in the post, eliminating messy e-mail threads on everybody’s inbox.


basecamp Top 10 Project Management Software for Remote Teams


When it comes to file sharing, Basecamp supports every popular file formats, ranging from word documents to images to any file type. When it comes to revisions, uploaded files with the same file name will not overwrite existing files, and the older file will be archived so that people can see what changes have been made. For uploaded images, users get to preview it first before downloading the file.

4. Central Desktop


Just like any online project management software, using Central Desktop will enable you to work anywhere as long as there’s an internet connection. It is a good thing to have a cloud-based platform to work on, eliminating clutter on your client thus keeping yourself organized.


centraldesktop Top 10 Project Management Software for Remote Teams


Users can get instant time tracker, real-time web conference (which is very important for every collaboration tool), built-in instant messenger, instant document editing (like Google Docs), and many more.


Central Desktop also has a sleek Twitter-like feature where users can post status updates about their task. It also features a discussion forums for teams to discuss their ideas (which is a good thing, especially when people live in different time zones).

5. Confluence


If you’re a wiki user then Confluence will be easy for you to use. Although it is not your usual wiki, it still incorporates many similar features like content creation for all users, intelligent search, discussion and many more. File sharing is made via drag and drop. Confluence is, unlike other project management software, more focused on documentation and information sharing. For big projects, proper documentation is definitely the key to a more organized execution of things.


confluence Top 10 Project Management Software for Remote Teams


Like WordPress, there are also several plugins that users can install for the system, each having their own purpose. And as people say, the best feature is its ability to integrate with Microsoft Office. That, in itself, says a lot.

6. Kapost


Kapost is a publishing management software perfect for bloggers and writers in collaboration. It is a virtual news room where users can present a concept and have it approved by an editor. There are three types of users here, the editors, contributors, and subscribers. Editors can approve, assign, and reject ideas to contributors.


kapost Top 10 Project Management Software for Remote Teams


Kapost also has a built-in feature for payments per post, although I haven’t personally tried it, I think it is a very cool feature especially when working with a very diverse team on an output-based payment.


The thing about Kapost is that it makes its users focus more on the concepts, increasing the quality of content. It’s like a real news room where people brainstorm together.

7. Producteev


Producteev works like an online to-do list which alerts you in real-time of what’s happening via e-mail, IM, or iPhone. Team leaders can create a virtual workspace and place collaborators there, create tasks and assign them to people, add deadlines and generate productivity report.


producteev Top 10 Project Management Software for Remote Teams

8. Teambox


Is your inbox getting out of hand? Teambox actually solves this problem by smartly organizing projects, telling you which conversation to look at, which to prioritize, etc.


teambox Top 10 Project Management Software for Remote Teams


The fun part I see here is that users can post status updates, just like Facebook, except that they are telling project members about their progress. Unlike other systems, Teambox is probably one of the few softwares out there that won’t make you go searching for the help file because things are so simple and easy to understand intuitively.

9. TeamLab


TeamLab is a free management platform for small to medium-sized companies. Using TeamLab is like having a social network within your company. You can create blog posts that the entire company can see, and the platform also got other social friendly features like company-wide announcements so that no one will be left behind, polls to gather public opinion, and many others. Members can even start their own discussions on the forums, making the whole company engaged in every activity they like.


teamlab Top 10 Project Management Software for Remote Teams


Another notable feature is its in-house chat messenger that connects every member, eliminating the use of other IMs for work’s communication.

10. Time Doctor


Time Doctor had me at dramatically reducing wasted time as in the world we are living now, time can make or break an entire company.


timedoctor Top 10 Project Management Software for Remote Teams

Its main features include an optional screenshot monitoring for remote employees (which is a little invasive, in my opinion, but will do the job), automatic generation of daily reports, keeping track of what websites and applications are used, and many other features that track every possible action of a user on his computer. I must say, if you want to be strict with every penny you pay for, Time Doctor is what you’re looking for.

From hongkiat.com

21 Điều Cần Biết Về Nút Google +1

Như các bạn đã biết, Google vừa cho ra mắt nút chia sẻ trực tuyến Google +1 dành cho các Webmaster nhúng vào website của mình để người sử dụng thuận tiện hơn trong việc chia sẻ những nội dung hay và bổ ích trên Internet thông qua tài khoản của Google.

Còn bạn, bạn đã nhúng nút Google +1 này vào website của mình chưa? Nếu chưa thì hãy làm nhanh và ngay, bởi vì theo đánh giá và nghiên cứu của nhiều chuyên gia hàng đầu trong lĩnh vực SEO, nút chia sẻ này tác động không nhỏ đến vị trí xếp hạng của trang web trong vị trí tìm kiếm trên Google.

Sau đây là 21 điều then chốt và cần biết về Google +1 so với các dịch vụ khác

1. Google +1 sẽ ảnh hưởng đến thứ hạng tìm kiếm. Điều này là chắc chắn vì đã được phát biểu bởi David Byttow trước khi công cụ này ra đời. “Chúng tôi sử dụng nút +1 như một trong những tín hiệu để xác định mức độ phù hợp và xếp hạng trên các trang tìm kiếm, bao gồm cả các tín hiệu và các công cụ khác...”

2. Khi người sử dụng đăng nhập và tìm kiếm, các kết quả sẽ được liên kết với Google +1. Dựa trên những trang đã “+1″, các kết quả tìm kiếm cũng sẽ được sắp xếp theo xu hướng của người dùng.

3. Google cho rằng người tìm kiếm sẽ tìm thấy nhiều kết quả có ích trên những trang web có chất lượng hơn dựa trên Google +1 này.

4. Khi người dùng nhấn vào nút này, một thẻ mới sẽ xuất hiện trong Google Profile của họ tương tự như Google Buzz.

5. Google đề nghị và khuyến khích bạn nên nhấn vào nút này khi bạn thích, đồng ý hoặc khuyên người khác nên đọc nội dung bạn đang xem.

6. Google +1 và Google Buzz tuy đều là sản phẩm của Google và nhúng vào Webiste nhưng xét về tính năng và hiệu quả thì cả hai khác biệt nhau rất lớn. Một điều dễ nhận biết nhất đó là Google +1 không cho phép bạn bình luận các nội dung mà bạn đã nhấn nút này trên trang Google Profile và tác động rất lớn đến vị trí kết quả tìm kiếm.

7. Có nhiều kích thước và kiểu dáng để bạn nhúng nút này vào Website để phù hợp tương ứng với 40 ngôn ngữ. Bạn có thể chỉnh sửa nút này bằng cách sử dụng các hàm API thông qua trang web này : http://code.google.com/apis/+1button/

8. Google +1 có thể đặt chung với các nút công cụ xã hội khác

9. Trong khi Google khuyến khích bạn nên đặt nút này ở vị trí mà người sử dụng chú ý nhất trên trang web thì các công ty SEO khuyên bạn nên đặt gần tiêu đề ở đầu trang trong mỗi bài viết, kiểu tương tự như eBlogviet hiện tại. Google cũng cho rằng vị trí tốt nhất đó là dưới mỗi bài viết hoặc cuối trang nhưng cái SEOer lại đi ngược lại điều này.

Tất nhiên đây mới chỉ là nhận định ban đầu và nằm trên lý thuyết, khả thi hay không thì do mỗi Webmaster trải nghiệm và quyết định.

10. Điều mà ai làm web cũng biết, nên đặt thẻ